• Home
  • Blog
  • About
    • Contact
    • Contributors
    • Collaborate
    • The Newsletter
  • Crafts
    • Reader Favorites
    • Polymer Clay
    • Watercolors
    • Let’s Paint
    • Adult Coloring
    • Paper Crafts
    • Jewelry
    • Mod Podge
    • Flowers
    • Little Lines
    • Inspiration
  • Freebies
    • iPhone Wallpapers
    • Gift Boxes
  • Seasonal
    • Spring
    • Easter
    • Mother’s Day
    • Summer
    • Fall
    • Halloween
    • Christmas
  • Shop
    • 
    • 
    • 
    • 
    • 

Lines Across

Lets Make a Mess

Simple Yarn and Button Owl Ornament {Christmas Ornament #5}

December 19, 2011 by Rachel 6 Comments

I love these yarn-wrapped ornaments. They are so easy to make, and you probably already have everything you need to make them sitting around your house.

What you need:


1. Yarn
2. Cardboard
3. Buttons
4. Felt
5. Glue gun and scissors

What you do:


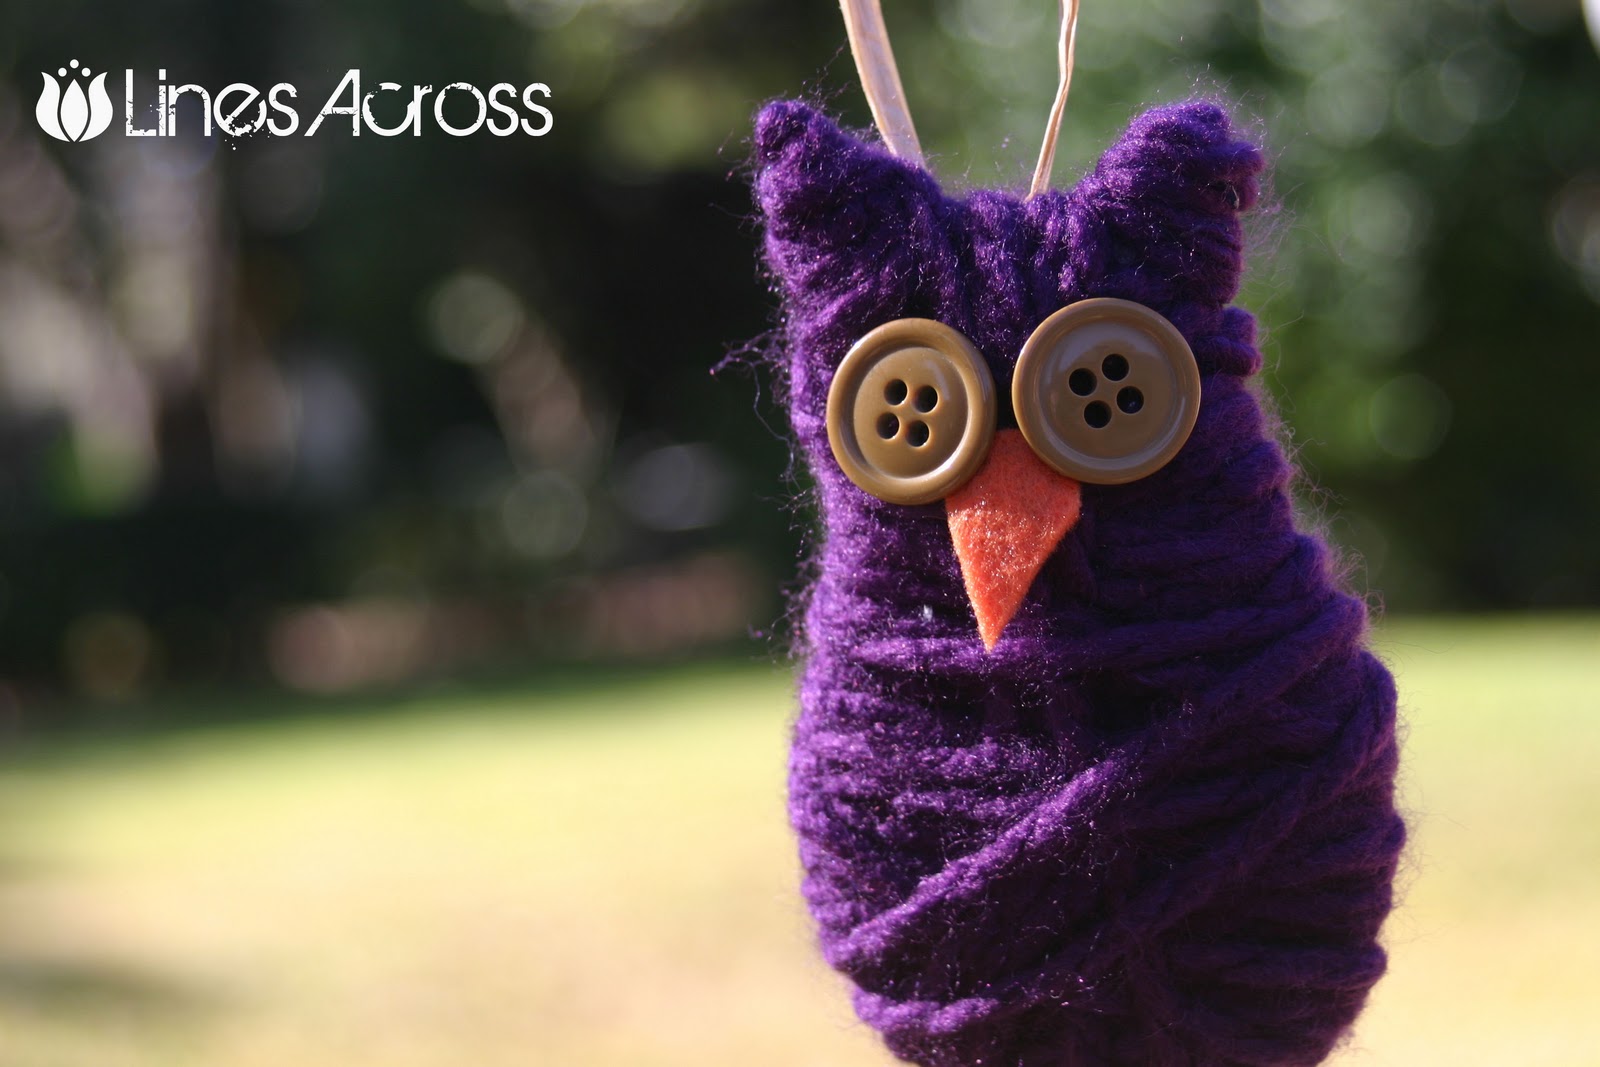
1. Draw the shape of an owl on a scrap piece of cardboard. I used thicker cardboard from an old box for support. You could also print a template if you are not good at drawing.

2. Pick out a color of yarn and start wrapping. I used a fluffy yarn for this owl and I like how it turned out. I used a hot glue gun to attach the yarn to the cardboard, but you could also tie a small knot.

3. Keep wrapping. Add small dabs of hot glue as you go, especially around the difficult places like the ears. Wrap in different directions.

4. To stop wrapping, add a small dab of glue to the end of the yarn. Tuck this piece behind some of the other yarn on the back of the ornament.

5. Cut out a small triangle from felt. Glue on the beak, then glue on button eyes.

6. Attach another piece of yarn, ribbon, twine, or wire as an ornament hanger.

About Rachel

Craft blogger. Color lover. Mess maker. Mom of three. You can find me at Lines Across sharing my creative adventures and tutorials on how to make stuff.

Shabby Apple Jewelry Giveaway (and 10% off Coupon Code)
A Crazy Ride and Some Goals for the New Year

Comments

  1. tute-bot says

    December 19, 2011 at 6:50 am

    Thank you for posting this tutorial! I've been looking for quick and easy ornaments that I can make with my nieces and nephews. This looks like a winner.

    Reply
  2. Sandy Ang says

    December 19, 2011 at 10:11 pm

    It's such a total cutie

    Reply
  3. Hannah @HannahHandmade says

    December 19, 2011 at 11:42 pm

    Wow! That’s cute! I like the little eyes. Come stop by my blog! 🙂

    http://www.hannahhandmade.blogspot.com

    Reply
  4. Daleko, daleko na Istoku... says

    December 21, 2011 at 5:39 am

    thank you for idea and tutorial! now i know what to do whit kids in school today! 🙂

    Reply
  5. amy moore says

    December 4, 2012 at 11:54 pm

    I love this so much, I think I will make these and attach them to all my gifts. Thanks for the idea!

    Reply
  6. Anonymous says

    December 18, 2014 at 6:29 pm

    I love this! I made 1 with little sparkly beads for eyes, and it was adorable!

    Reply

Leave a Reply Cancel reply

Your email address will not be published. Required fields are marked *

Well hello! ••• I’m Rachel. Let’s Make a Mess.

Sign up for weekly updates and exclusive freebies.

Let’s Connect

  • 
  • 
  • 
  • 
  • 

Popular Posts

How to Turn Your Instagrams into Stickers

How to Turn Your Instagrams into Stickers

DIY Balloon Weight Centerpiece

DIY Balloon Weight Centerpiece

Lego Gift Boxes (With Free Templates)

Lego Gift Boxes (With Free Templates)

Recent Posts

  • DIY Wooden Pencil Cup
  • Weaving without a Loom
  • Unicorn Mason Jars
  • Our Little Adventure with Toyota Corolla
  • DIY Plant Stand
  • DIY Sidewalk Chalk Paint

Archives

Categories

Meta

  • Log in
  • Entries RSS
  • Comments RSS
  • WordPress.org
  • Home
  • Blog
  • About
  • Crafts
  • Freebies
  • Seasonal
  • Shop

© 2025 · Pretty Creative WordPress Theme by, Pretty Darn Cute Design