Hello, Lines Across readers! My name is Allison and I’m the crafty cat lady that just won’t stop over at Dream a Little Bigger.

At my own little piece of internet turf I share things I make with my own two hands 5 or 6 times a week! You’ll also find tasty recipes, interesting interviews with bloggers and an up-and-coming Sunday link party!

Today I’m going to share with you a super crafty Christmas ornaments you can make to sweeten up your holiday decor! These giant gumdrop ornaments are the bees knees if you ask me and they’re super easy to prepare. I’d suggest working through one, getting it down and then assembly lining all of the others after to save yourself some big time! Heck, you can even get the kids involved so they can see what life is like for an elf in the employ of one Mr. Claus.
How about if I stop gabbing and we get on with this tutorial? For this project you will need:
- paper mache eggs
- gold string
- X-acto knife
- cardboard or cardstock
- hot glue
- decoupage
- gumdrop colors of paint (red, purple, green, yellow, orange)
- chunky translucent glitter (not the fine stuff, doesn’t work)

There are lots of different size paper mache eggs. I chose the ones that were most like a hen’s egg in size. The pointier end of the egg is going to be our gumdrop. Take and trim the bottom part off like seen in the picture above.

Take a small drill bit and drill a hole in the top of the egg. Cut a piece of gold string that is about 4-5 inches long and push into the hole.

Glob on some hot glue inside to keep the string ends in place.

Run hot glue around the bottom edge of the egg and place on a piece of cardstock. Use your glue as a caulk of sorts to fill any gaps that might occur from a less than perfect cut line.
 Once the glue is dry trim the excess cardstock from the bottom. The glue will still be kind of tacky and will want to stick to your blade or scissors, so be careful so that you don’t accidentally cut yourself.
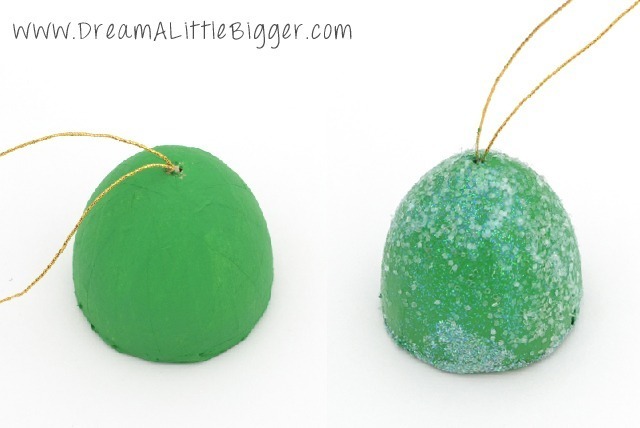
Depending on the quality of your paint, you’ll need to apply anywhere between 1-4 coats to fully cover the brown of the paper mache. Honestly, I wish I would have bit the bullet and spent the extra 75 cents a bottle so that I would have been done lots and lots faster!
When the paint is dry and to your liking, brush on a thin coat of Mod Podge and sprinkle your chunky glitter on. Spray with acrylic sealer if you wish to help prevent glitter from taking over your home (because it’s the craft supply that stays). I figure it’s Christmas-time and everything is covered in glitter so I didn’t even bother!
Now, the one on the right above I first tried using the fine glitter and then the chunky. Then I sat here for a few days giving it the stink eye and trying to figure out what wasn’t jiving. In the end, I totally omitted the fine glitter because it’s just distracting. Definitely all chunky all the way!

And there are my cute sweeties on a tree! So what do you say? Will you be knocking some of these guys out?


Thanks so much for having me. Very honored!
Allison – you are so talented! How fun are these?