• Home
  • Blog
  • About
    • Contact
    • Contributors
    • Collaborate
    • The Newsletter
  • Crafts
    • Reader Favorites
    • Polymer Clay
    • Watercolors
    • Let’s Paint
    • Adult Coloring
    • Paper Crafts
    • Jewelry
    • Mod Podge
    • Flowers
    • Little Lines
    • Inspiration
  • Freebies
    • iPhone Wallpapers
    • Gift Boxes
  • Seasonal
    • Spring
    • Easter
    • Mother’s Day
    • Summer
    • Fall
    • Halloween
    • Christmas
  • Shop
    • 
    • 
    • 
    • 
    • 

Lines Across

Lets Make a Mess

Personalized 3D Paper Ribbon

July 1, 2013 by Rachel 7 Comments

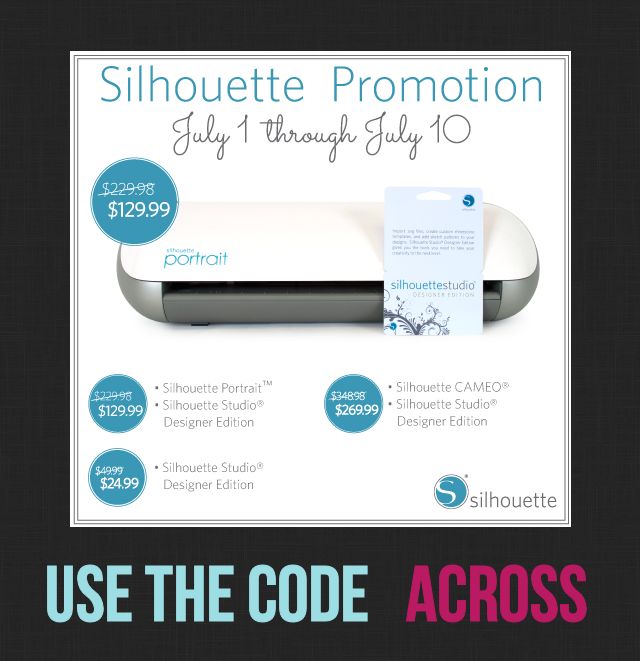
Today I’m happy to share with you my very first Silhouette project, as well as a great promotional discount code (ACROSS) so that you can buy your very own Silhouette.

I actually got the smaller Silhouette Portrait to save much valued space and money, and I am IN LOVE. Pretty much anything you can imagine, you can create. If you’re looking to create larger items, and have a larger crafting space available, I would definitely recommend the Silhouette Cameo. However, other than a smaller cutting surface, you won’t be missing out on any features by buying the Portrait.

There are so many great designs available at the Silhouette online store (for only $0.99) that you can buy and cut very quickly with no real designing involved. For example, I got this castle design, cut it out onto a piece of pink vinyl, and added it to my daughter’s plain white potty in about 5 minutes total. Now she has her very own princess potty.

However, one of the BEST parts of the Silhouette (as compared to other similar products) is the endless possibilities of things you can create with the studio software. The designer software (that is included in the promotional bundle below) has a lot of great additional features to make creating your own designs even easier.

How to Make Personalized Paper Ribbon:

1. Open your Silhouette Studio software (I used the Designer Edition. It has a few features that make it a little easier to create this project). 
2. Create a long rectangle that goes all of the way from the top of the page to the bottom. I made mine .5 inches wide. If you are using the Designer Software, turn the grid on.
3. Use the text function to create your text. I used the font Bebas, which works great for this kind of project.
4. Open the rotate window, and rotate the text 90 degrees. Move the text over so that it is overlapping the rectangle. Make sure that enough of the text overlaps to make it secure and sturdy.
5. Use the arrow to create a rectangle to select both the long rectangle and the words. Right click and select weld.
6. Now click send to Silhouette. Make sure that your cut settings are all right for the paper you are using. I used 65 lb. cardstock which works great.
7. Follow the same instructions now using whatever shapes you want to pop up behind your name. I used a cloud (this image came pre-loaded when I bought my Silhouette) and an airplane I found at the online store. The grid helps you make sure that the different shapes are the right size. I wanted the cloud to be just big enough to frame the name Benjamin.
8. Using a ruler or straight edge, carefully fold over and crease the top image or letters right along the line of the rectangle.
9. Arrange the different strips along your box where you want them. Then use double sided tape to secure the top piece to the top of the box, and tape the strips of paper underneath your box or package.
I love how this project turned out. It is so unique and fun, and it takes about 10 minutes for the whole project. I made this boyish one for my son’s 4th birthday, and he loves looking at it and thinking about opening it on his birthday. I think for my daughter, I’d like to make a pop up castle.
If you already have the basic Silhouette Studio software, you can upgrade to the Designer Edition for 50% off using the code ACROSS. You can also purchase the Cameo or Portrait as a part of a great discounted bundle here, using the code ACROSS.

Want to learn more about the Designer Edition? Here are some of the special features it offers:
  • Ability to open, manipulate, and cut .svg files
  • Rhinestone tools to convert designs into rhinestone templates and create your own rhinestone designs
  • Sketch tools to convert designs into several styles of sketchable art
  • Creative knife tools to allow you to clip designs using different patterns
  • Enhanced eraser set to modify designs with more precision
  • Built-in ruler and guide lines for precise alignment and drawing
If you’re interested in using your Silhouette to create rhinestone patterns, or to create your own sketchable art along with the sketch pens, then the Designer Software is a must. Even if you’re not sure you will need this software right away, I would definitely recommend buying it now while it’s 50% off.
Remember, this promotion lasts from July 1 through July 10!
If you were to create this kind of pop up ribbon, what shapes and colors would you use?

*This post contains affiliate links. All thoughts and opinions are my own, and I only promote products that I use and love. 

About Rachel

Craft blogger. Color lover. Mess maker. Mom of three. You can find me at Lines Across sharing my creative adventures and tutorials on how to make stuff.

Monday Funday #24 – A Creative Link Party
14 Gorgeous Bun Tutorials

Comments

  1. Randi@SowderingAbout says

    July 2, 2013 at 4:32 am

    This is seriously amazing. I love it!!!!!!

    Reply
    • linesacross@gmail.com says

      July 2, 2013 at 3:25 pm

      Thanks! I love it too 🙂 It is especially fun in person.

      Reply
  2. Bonnie and Trish @ Uncommon says

    July 2, 2013 at 9:09 pm

    That is awesome!! I just love how creative and out of the box you are… a true gift. Looking forward to seeing you in a few weeks!

    Take care,

    Trish

    Reply
  3. Mary Beth says

    July 3, 2013 at 1:00 am

    This is so cute ~ I love it! What a wonderful idea.

    Reply
  4. Nat and Holly says

    July 5, 2013 at 3:01 pm

    I am in LOVE with this idea, Rachel! You are so creative!

    Reply
  5. malia says

    July 9, 2013 at 2:19 pm

    Simply adorable and so clever!

    Reply
  6. Barbara Hiatt says

    July 9, 2013 at 7:32 pm

    Adore this Rachel! Beautifully done!

    Reply

Leave a Reply Cancel reply

Your email address will not be published. Required fields are marked *

Well hello! ••• I’m Rachel. Let’s Make a Mess.

Sign up for weekly updates and exclusive freebies.

Let’s Connect

  • 
  • 
  • 
  • 
  • 

Popular Posts

Watercolors for Beginners: Part 3 – Simple Silhouette Art

Watercolors for Beginners: Part 3 – Simple Silhouette Art

Watercolor for Beginners 4 – Polka Dot Art

Watercolor for Beginners 4 – Polka Dot Art

Little DIY Notebooks

Little DIY Notebooks

Recent Posts

  • DIY Wooden Pencil Cup
  • Weaving without a Loom
  • Unicorn Mason Jars
  • Our Little Adventure with Toyota Corolla
  • DIY Plant Stand
  • DIY Sidewalk Chalk Paint

Archives

Categories

Meta

  • Log in
  • Entries RSS
  • Comments RSS
  • WordPress.org
  • Home
  • Blog
  • About
  • Crafts
  • Freebies
  • Seasonal
  • Shop

© 2025 · Pretty Creative WordPress Theme by, Pretty Darn Cute Design