• Home
  • Blog
  • About
    • Contact
    • Contributors
    • Collaborate
    • The Newsletter
  • Crafts
    • Reader Favorites
    • Polymer Clay
    • Watercolors
    • Let’s Paint
    • Adult Coloring
    • Paper Crafts
    • Jewelry
    • Mod Podge
    • Flowers
    • Little Lines
    • Inspiration
  • Freebies
    • iPhone Wallpapers
    • Gift Boxes
  • Seasonal
    • Spring
    • Easter
    • Mother’s Day
    • Summer
    • Fall
    • Halloween
    • Christmas
  • Shop
    • 
    • 
    • 
    • 
    • 

Lines Across

Lets Make a Mess

Stamped Cookie Cutter Clay Ornaments

November 20, 2013 by Rachel 7 Comments

If you haven’t worked with Polymer clay before, then you’re missing out. It is much simpler than I had expected, and there are so many possibilities. I shared beginners’ tips for working with Polymer clay when I first “discovered” it last year.

I wanted to make some gift tags/ornaments to put on Christmas gifts this year. I know that you can make ornaments like this out of salt dough, but I wanted them to be smoother and sturdier so I used Polymer clay. I made this train ornament for my son Benjamin who is obsessed with trains.
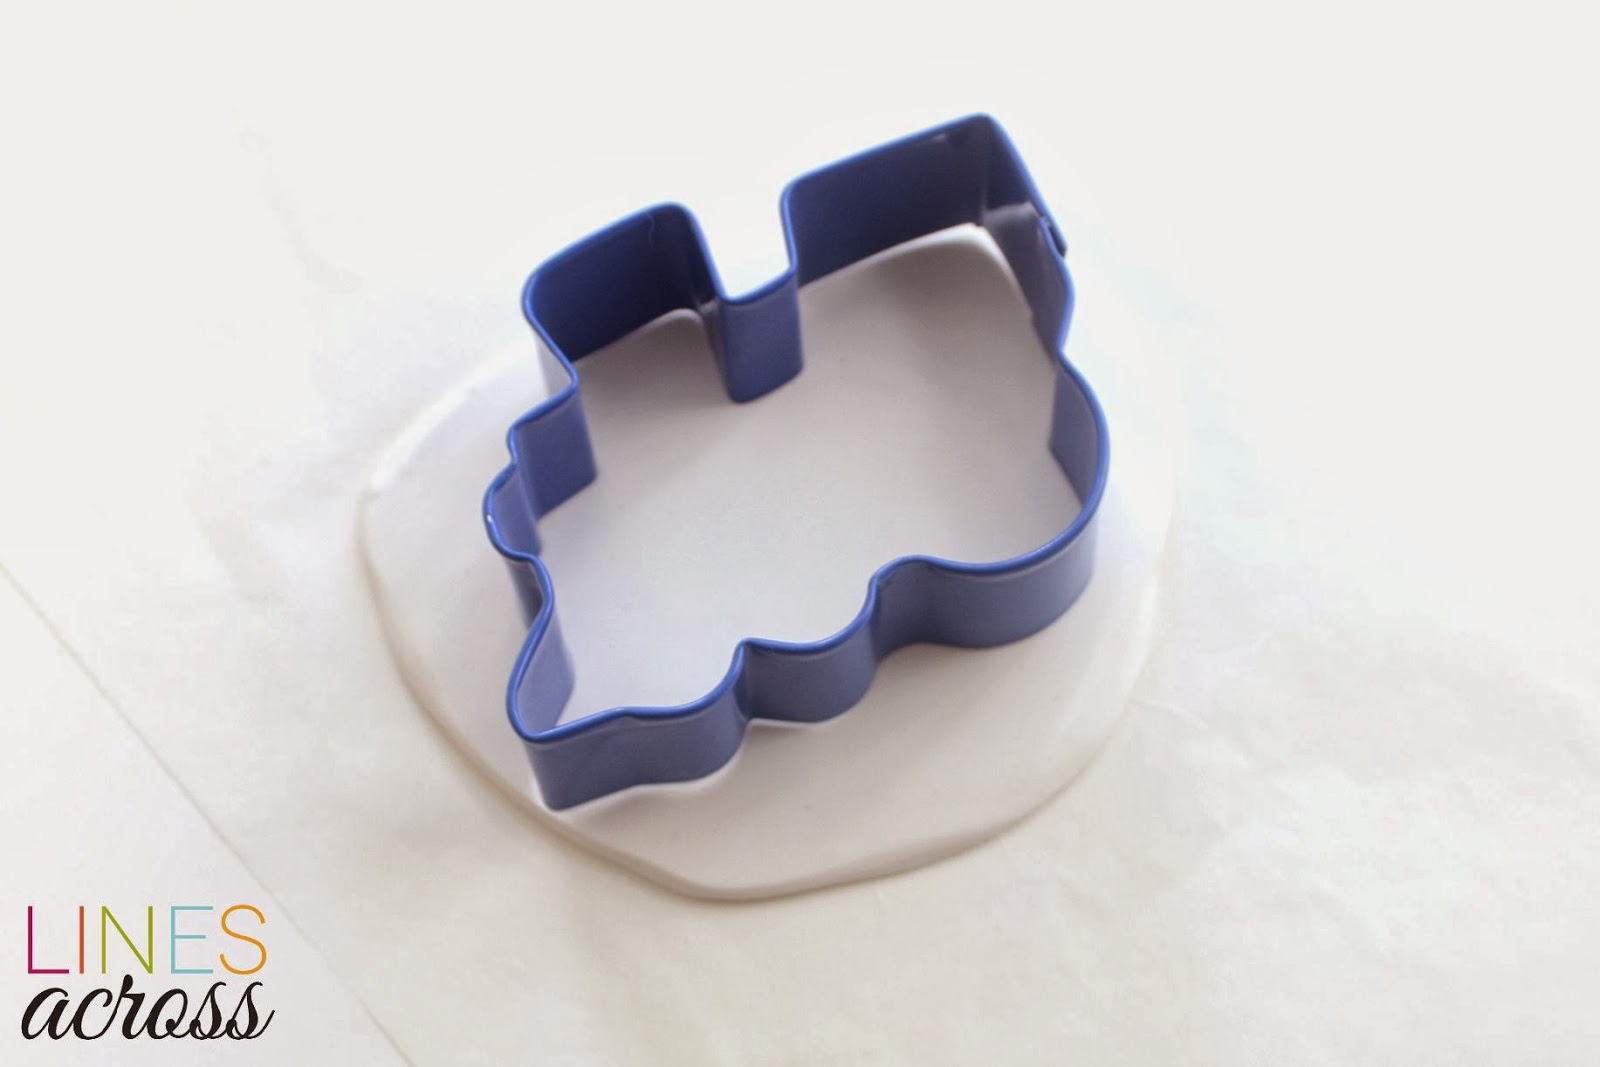
What you need:

1. Polymer Clay
2. Cookie Cutters (Don’t use them on food after you’ve used them with your clay!)
3. Alphabet Stamps
4. Stamp Ink
5. Twine or Ribbon

What you do:


1. Knead your clay until it softens. It can be really tough at first. Roll it out to a thin flat layer. Place your cookie cutter onto the clay and push it down a little bit so that there is an outline left on the clay.

2. Gather your stamps for all of the letters you will be using. Make sure they are clean. I used black stamp ink. It lightens a little bit when baked, but it still is nice and dark against the white clay.

3. Dab each letter on your stamp pad, making sure that you don’t get any ink around the edges of the stamp. If you do, it will show up as a circle around your letter. Gently press down on the stamp into the clay until the top of the stamp reaches the surface of the clay. Don’t press any further. It may be worth it to test/practice a few times on a little piece of clay before you start.

4. Use a straw to punch a hole in the top of your ornament. Then line up your cookie cutter again right over the creases from before and punch all the way through. Just like a cookie, move your clay ornament to a baking sheet and bake according to the instructions on your clay (different brands of clay have slightly different baking times and temperatures.)

5. Let it cool fully before doing anything else. Add ribbon or twine. You can make them just as ornaments, or also use then as gift tags that double as ornaments.

This post was originally a guest post at Design Dazzle.

About Rachel

Craft blogger. Color lover. Mess maker. Mom of three. You can find me at Lines Across sharing my creative adventures and tutorials on how to make stuff.

24 Free Graphic Christmas iPhone Wallpapers
Gold Vinyl Christmas Gift Tags

Comments

  1. Anonymous says

    November 21, 2013 at 7:30 am

    Thanks, this is great. I plan on doing this with stars and putting on the names of Christ, or other Christmas words like Noel. Plus, this would be easy to add some sparkle too also if desired.

    Reply
    • linesacross@gmail.com says

      November 21, 2013 at 10:18 pm

      Great ideas! There are definitely a lot of fun possibilities.

      Reply
      • Nancy says

        February 23, 2017 at 2:19 pm

        I have 2 sets of alphabet stamps and don’t like either of them. What are you using in this project and WHERE can I buy them?

        Reply
        • Rachel says

          February 28, 2017 at 11:11 pm

          I know what you mean! Some of them don’t look quite right when you use them. I actually bought these letter stamps a couple of years ago and I think I got them at Michael’s. I’ve also gotten a couple other sets of letter stamps at Michael’s that I really love, and I got one set in the dollar spot at Target one time.

          Reply
  2. Jessica Petersen says

    November 25, 2013 at 1:15 am

    Oh, I love this! And we even have that exact cookie cutter. 🙂 I'll be sharing this on the Play Trains! Facebook page soon.

    Reply
  3. Morales´s Ruth says

    November 25, 2013 at 12:52 pm

    Wonderful !!!

    Reply
  4. Candace Herrero says

    December 5, 2013 at 2:10 am

    Another reason to buy polymer clay AND awesome cookies cutters! On my to-buy list! I can't wait to make some of these!!

    Reply

Leave a Reply Cancel reply

Your email address will not be published. Required fields are marked *

Well hello! ••• I’m Rachel. Let’s Make a Mess.

Sign up for weekly updates and exclusive freebies.

Let’s Connect

  • 
  • 
  • 
  • 
  • 

Popular Posts

Ombre DIY Candle Holders

Ombre DIY Candle Holders

How to Paint Watercolor Ice Cream Cones

How to Paint Watercolor Ice Cream Cones

Watercolor for Beginners 4 – Polka Dot Art

Watercolor for Beginners 4 – Polka Dot Art

Recent Posts

  • DIY Wooden Pencil Cup
  • Weaving without a Loom
  • Unicorn Mason Jars
  • Our Little Adventure with Toyota Corolla
  • DIY Plant Stand
  • DIY Sidewalk Chalk Paint

Archives

Categories

Meta

  • Log in
  • Entries RSS
  • Comments RSS
  • WordPress.org
  • Home
  • Blog
  • About
  • Crafts
  • Freebies
  • Seasonal
  • Shop

© 2023 · Pretty Creative WordPress Theme by, Pretty Darn Cute Design